TL;DR If you don’t feel like reading my ramblings, the Github repository with the final state of the
docker-compose.yamlfile, as well as the necessary configuration files can be found here.
If you’re anything like me, you like to tinker with everything technology-related. You’re also weary of fingerprinting and tracking of your online habits, and would like to set up a way of routing your self-hosted services like PiHole through a VPN, while keeping everything easily configurable and transferable. If you’re nodding your head right now, you’ve come to the right place.
Containers#
Containers, in this context, are used as a reference to any containerization platform that performs OS-level virtualization through multiple userspace container instances. The benefit of using containers is that we are able to encapsulate the software and its dependencies into a single package that can then be deployed in different environments. Configuration of these “containers” should be done through files, making a deployment replicable and transferable across different environments.
WireGuard#
Like the older OpenVPN protocol, WireGuard is a protocol and software implementation for establishing virtual private
networks (VPNs). It excels in its lower overhead relative to older protocols, its high performance and its easy
configuration. The protocol was released in the Linux 5.6 kernel, which we will be making use of its kernel modules
inside a container by exposing /lib/modules. The standard software implementation of the WireGuard protocol is also
called WireGuard, which may cause some confusion, but all we need to know is that it the application that allows us to
interact with the wireguard kernel module. Most of the time we’ll be using wg-quick, the utility to establish and
stop WireGuard VPN connections.
Linuxserver.io#
Linuxserver.io is a community and community-maintained list of docker container images who follow a unified
best-practices approach to their container images, while maintaining small container sizes and some helpful added-on
functionality that we will be making use of for implementing the kill switch. They maintain a WireGuard (userspace
utilities) image that we will use as the outbound VPN container through which all other containers will connect to the
internet. Using Linuxserver.io’s /custom-cont-init.d folder we can add a startup script that will be run before the
VPN connection is made. The GitHub image repository can be found here.
VPN#
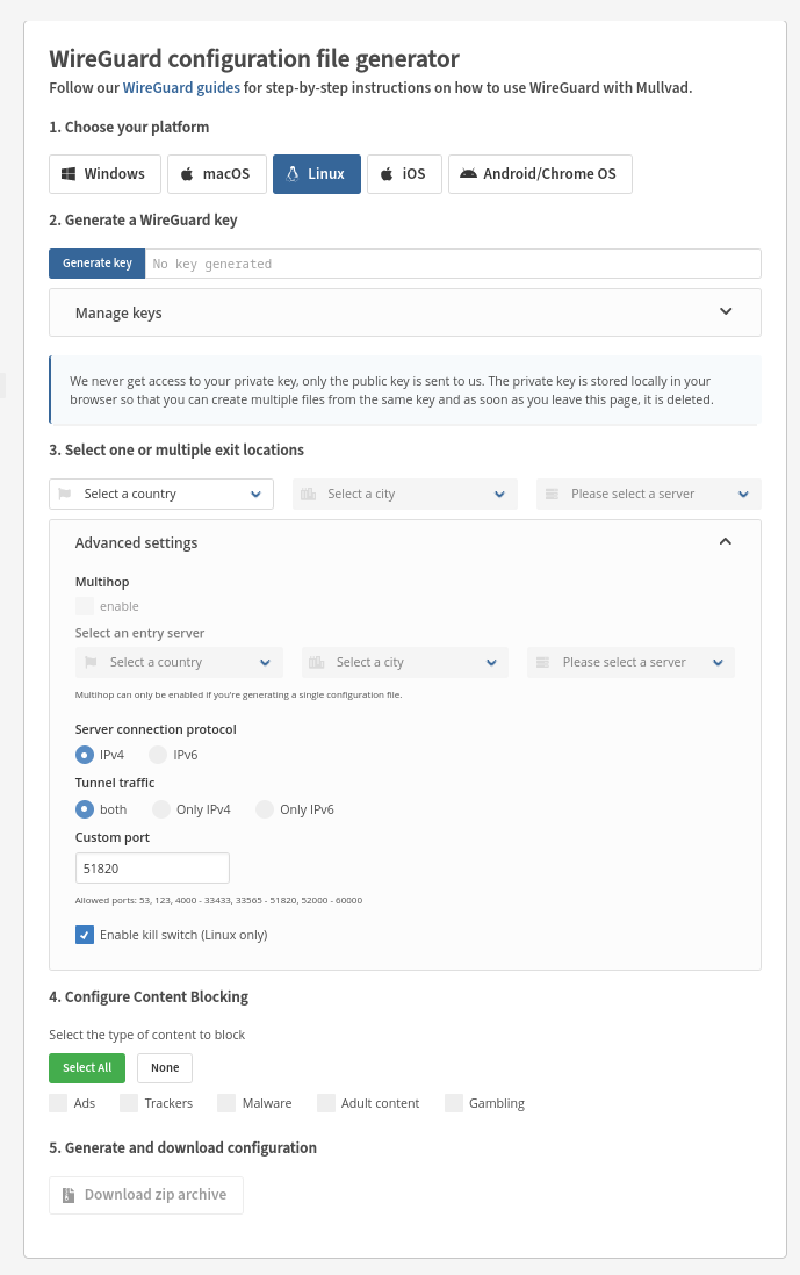
It’s now time to set up our own VPN client with a correctly configured kill switch and add some other images to use it. The first step is to get your own VPN provider, I have used Mullvad VPN for a few years as my VPN provider of choice and have never had any issues with them. They run a no-log VPN service, their clients are open source, and they helped fund WireGuard’s development, so it’s a pretty easy choice for me. Most importantly, in this case, is that you can generate a WireGuard client configuration that you can then use as the configuration for your Linuxserver.io WireGuard container.
Putting it all together#
OK, we’re ready to create our stack. Following Linuxserver.io WireGuard container’s instructions, we can generate our first docker-compose.yaml.
### DOCKER-COMPOSE.YAML FILE ###
services:
  wireguard:
    image: lscr.io/linuxserver/wireguard:latest
    container_name: wireguard
    hostname: wireguard
    cap_add:
      - NET_ADMIN
      - SYS_MODULE
    environment:
      - PUID=${PUID}
      - PGID=${PGID}
      - TZ=${TZ}
    volumes:
      - ${CONFIG_DIR}/wireguard:/config
      - ${CONFIG_DIR}/wireguard_startup:/custom-cont-init.d:ro
      - /lib/modules:/lib/modules
    sysctls:
      - net.ipv4.conf.all.src_valid_mark=1
    restart: unless-stopped
The variables in the docker-compose.yaml file are saved in the .env file, which get automatically used by
docker-compose:
### .ENV FILE ###

# ======== user ========
PUID=1000
PGID=1000
TZ=Australia/Sydney

# ======== directories ========
CONFIG_DIR=/home/jmartins/wireguard-stack/configs
In order to use WireGuard we need to drop a WireGuard configuration file in the container’s /config folder that we map
to our ${CONFIG_DIR}/wireguard folder. Generating this file on Mullvad’s website is fairly easy, and in this case we’re
only using an IPv4-only configuration since we want to manually control the ports available from outside the host. The
generated configuration should look something like this:
[Interface]
PrivateKey = [REDACTED]
Address = 10.64.114.74/32
DNS = 10.64.0.1

[Peer]
PublicKey = a6oniBujlUXqOmv5Hst0v8xCqidy7O4JcN8Q6YRM5Hk=
AllowedIPs = 0.0.0.0/0
Endpoint = 89.44.10.178:51820
If we run the docker-compose up -d command, the default network will now be created, along with the docker container. We can
test the spun up container by executing docker exec -it wireguard /bin/bash to get access to a bash session inside the
running container. Here, we can run regular network tests like curling Mullvad’s connection check URLand pinging
IP addresses:
root@wireguard:/# curl https://am.i.mullvad.net/connected
You are connected to Mullvad (server au14-wireguard). Your IP address is 89.44.10.183

root@wireguard:/# ping 1.1.1.1
PING 1.1.1.1 (1.1.1.1) 56(84) bytes of data.
64 bytes from 1.1.1.1: icmp_seq=1 ttl=58 time=3.84 ms
64 bytes from 1.1.1.1: icmp_seq=2 ttl=58 time=3.82 ms
64 bytes from 1.1.1.1: icmp_seq=3 ttl=58 time=3.29 ms
^C
--- 1.1.1.1 ping statistics ---
3 packets transmitted, 3 received, 0% packet loss, time 2004ms
rtt min/avg/max/mdev = 3.293/3.651/3.838/0.253 ms
You are now ready to start routing connections through this container by setting their network mode as
"service:wireguard". But before we get to that, lets take care of the network kill switch, which will prevent requests
to flow outside the network if for some reason the VPN connection is dropped.
WireGuard Kill Switch#
Generating the wg0.conf file on Mullvad’s website allows us to add a kill switch to the wireguard configuration. These
are nothing but shell commands that run PostUp and PreDown, up and down referring to wg-quick’s verbs for starting
and stopping the VPN client connection.
Creating a WireGuard configuration with a kill switch yields the following file:
[Interface]
PrivateKey = [REDACTED]
Address = 10.64.23.84/32,fc00:bbbb:bbbb:bb01::1:1753/128
DNS = 10.64.0.1
PostUp = iptables -I OUTPUT ! -o %i -m mark ! --mark $(wg show %i fwmark) -m addrtype ! --dst-type LOCAL -j REJECT && ip6tables -I OUTPUT ! -o %i -m mark ! --mark $(wg show %i fwmark) -m addrtype ! --dst-type LOCAL -j REJECT
PreDown = iptables -D OUTPUT ! -o %i -m mark ! --mark $(wg show %i fwmark) -m addrtype ! --dst-type LOCAL -j REJECT && ip6tables -D OUTPUT ! -o %i -m mark ! --mark $(wg show %i fwmark) -m addrtype ! --dst-type LOCAL -j REJECT

[Peer]
PublicKey = pu22RCPeJCeiDIE7a1XtWvmv3BdgPp8ugF6AyntW8xU=
AllowedIPs = 0.0.0.0/0,::0/0
Endpoint = 89.44.10.114:51820
The kill switch commands consist of iptables rules blocking all outbound traffic in the container and allowing only
traffic to flow through the wireguard network adapter.
Using the downloaded configuration file, we can see that stopping the connection will remove the iptables rules, allowing traffic to flow out:
root@wireguard:/# curl https://am.i.mullvad.net/connected
You are connected to Mullvad (server au14-wireguard). Your IP address is 89.44.10.183

root@wireguard:/# ping 1.1.1.1
PING 1.1.1.1 (1.1.1.1) 56(84) bytes of data.
64 bytes from 1.1.1.1: icmp_seq=1 ttl=58 time=3.28 ms
64 bytes from 1.1.1.1: icmp_seq=2 ttl=58 time=11.6 ms
64 bytes from 1.1.1.1: icmp_seq=3 ttl=58 time=4.08 ms
^C
--- 1.1.1.1 ping statistics ---
3 packets transmitted, 3 received, 0% packet loss, time 2004ms
rtt min/avg/max/mdev = 3.278/6.304/11.559/3.730 ms

root@wireguard:/# wg-quick down wg0
Warning: `/config/wg0.conf' is world accessible
[#] iptables -D OUTPUT ! -o wg0 -m mark ! --mark $(wg show wg0 fwmark) -m addrtype ! --dst-type LOCAL -j REJECT && ip6tables -D OUTPUT ! -o wg0 -m mark ! --mark $(wg show wg0 fwmark) -m addrtype ! --dst-type LOCAL -j REJECT
[#] ip -4 rule delete table 51820
[#] ip -4 rule delete table main suppress_prefixlength 0
[#] ip -6 rule delete table 51820
[#] ip -6 rule delete table main suppress_prefixlength 0
[#] ip link delete dev wg0
[#] resolvconf -d wg0 -f
[#] iptables-restore -n
[#] ip6tables-restore -n

root@wireguard:/# curl https://am.i.mullvad.net/connected
You are not connected to Mullvad. Your IP address is 161.8.193.91
root@wireguard:/# ping 1.1.1.1
PING 1.1.1.1 (1.1.1.1) 56(84) bytes of data.
64 bytes from 1.1.1.1: icmp_seq=1 ttl=57 time=2.66 ms
64 bytes from 1.1.1.1: icmp_seq=2 ttl=57 time=3.87 ms
64 bytes from 1.1.1.1: icmp_seq=3 ttl=57 time=3.30 ms
^C
--- 1.1.1.1 ping statistics ---
3 packets transmitted, 3 received, 0% packet loss, time 2003ms
rtt min/avg/max/mdev = 2.657/3.276/3.872/0.496 ms
Note on DNS resolution vs outbound traffic#
There is a possibility that you may confuse lack of DNS resolution with blocked outbound traffic if your IP block overlaps with your container network subnet. This is unlikely to happen and that would mean that DNS resolution was blocked regardless of iptables rules, but it also means that you may be mistaken on the state of your container network rules. This could, for example, allow through traffic that does not depend on DNS, like say a peer-to-peer connection.
The solution is then to remove the PreDown directive, leading to an outbound blocked connection state whenever the connection is brought down.
root@wireguard:/# wg-quick down wg0
Warning: `/config/wg0.conf' is world accessible
[#] ip -4 rule delete table 51820
[#] ip -4 rule delete table main suppress_prefixlength 0
[#] ip -6 rule delete table 51820
[#] ip -6 rule delete table main suppress_prefixlength 0
[#] ip link delete dev wg0
[#] resolvconf -d wg0 -f
[#] iptables-restore -n
[#] ip6tables-restore -n

root@wireguard:/# curl https://am.i.mullvad.net/connected
curl: (6) Could not resolve host: am.i.mullvad.net

root@wireguard:/# ping 1.1.1.1
PING 1.1.1.1 (1.1.1.1) 56(84) bytes of data.
From 10.0.0.2 icmp_seq=1 Destination Port Unreachable
ping: sendmsg: Operation not permitted
From 10.0.0.2 icmp_seq=2 Destination Port Unreachable
ping: sendmsg: Operation not permitted
From 10.0.0.2 icmp_seq=3 Destination Port Unreachable
ping: sendmsg: Operation not permitted
^C
--- 1.1.1.1 ping statistics ---
3 packets transmitted, 0 received, +3 errors, 100% packet loss, time 2032ms
A less curious/paranoid person would at this point be happy with the kill switch functionality. However, I am neither of those. Since the kill switch depends on a successful parsing of the wireguard configuration file, an issue presents itself with the way the container handles failure. In short, if there are any issues parsing the configuration file, the container will not connect to the VPN server and continue allowing outbound network calls to flow through. Silently.
In a borrowed term from mechanical engineering into application/network security, this is a case of fail open, where a failure on startup will lead to a permissive state. If we purposely create this error, we can see the issue.
[Interface]
PrivateKey = [REDACTED]
Address  # This malformed configuration leads to an error
DNS = 10.64.0.1
PostUp = iptables -I OUTPUT ! -o %i -m mark ! --mark $(wg show %i fwmark) -m addrtype ! --dst-type LOCAL -j REJECT && ip6tables -I OUTPUT ! -o %i -m mark ! --mark $(wg show %i fwmark) -m addrtype ! --dst-type LOCAL -j REJECT

[Peer]
PublicKey = a6oniBujlUXqOmv5Hst0v8xCqidy7O4JcN8Q6YRM5Hk=
AllowedIPs = 0.0.0.0/0
Endpoint = 89.44.10.178:51820
Docker log of the container startup:
...
wireguard  | Warning: `/config/wg0.conf' is world accessible
wireguard  | [#] ip link add wg0 type wireguard
wireguard  | [#] wg setconf wg0 /dev/fd/63
wireguard  | [#] ip -4 address add Address dev wg0
wireguard  | Error: inet prefix is expected rather than "Address".
wireguard  | [#] ip link delete dev wg0
...
We can then see that we are able to make outbound requests from the container, as if we were connected and blocking requests outside the VPN tunnel:
root@wireguard:/# curl https://am.i.mullvad.net/connected
You are not connected to Mullvad. Your IP address is X.X.X.X
If we would like to make this a fail close system, a solution is to decouple the iptables outbound rules setting from the WireGuard execution. Making use of the Linuxserver container addons we can add a script that will be run on container startup and will block outbound connections the same way as PostUp does.
#!/bin/bash

echo "**** IPTABLES BLOCK ****"
iptables -I OUTPUT ! -o wg0 -m mark ! --mark 0xca6c -m addrtype ! --dst-type LOCAL -j REJECT
ip6tables -I OUTPUT ! -o wg0 -m mark ! --mark 0xca6c -m addrtype ! --dst-type LOCAL -j REJECT
wg-quick automatically adds a mark on all encrypted packets it sends1, with the value of this mark being the port it
is configured to connect through. If you use the default 51820 port, then the iptables rules matching 0xca6c will work,
as this is the hexadecimal representation of decimal 51820. If you use any other port, then you must change this script
to the correct hexadecimal value, and if you forget to do this, no traffic will be allowed to flow outbound from the
container. Again, failing closed.
root@wireguard:/# curl https://am.i.mullvad.net/connected
curl: (6) Could not resolve host: am.i.mullvad.net

root@wireguard:/# ping 1.1.1.1
PING 1.1.1.1 (1.1.1.1) 56(84) bytes of data.
From 10.0.0.2 icmp_seq=1 Destination Port Unreachable
ping: sendmsg: Operation not permitted
From 10.0.0.2 icmp_seq=2 Destination Port Unreachable
ping: sendmsg: Operation not permitted
From 10.0.0.2 icmp_seq=3 Destination Port Unreachable
ping: sendmsg: Operation not permitted
^C
--- 1.1.1.1 ping statistics ---
3 packets transmitted, 0 received, +3 errors, 100% packet loss, time 2032ms
Note: In the default Mullvad wireguard configuration, the packet mark is obtained by running
wg show %i fwmark, where%iis the wireguard interface name as expanded inwg-quick2. This won’t work here, as the startup script will run before the wireguard interface is created, and thus we instead hardcode the mark to0xca6cinstead, ensuring that, regardless of the wireguard connection state, only packets marked with0xca6cwill be allowed to egress.
VPN consumers#
Now that we have the container ready and we’re correctly stopping requests we don’t want to proceed, we can configure
other containerised images that we will route through the VPN container exclusively. This will both route all their
network requests through the WireGuard container as well as make them subject to its outbound network rules containing
the kill switch. For this, we’ll use docker-compose’s network_mode3 option, as suggested in this
Linuxserver.io article4, allowing a container to make use of a different container’s network
stack, in this case the WireGuard container.
As an example consumer application, we’re using here the thespeedtest-tracker, which will periodically, every ten
minutes, run a speed test in its network interface and store the result. Since we’re forcing the container to use the
wireguard container’s network stack, its iptables rules will apply and all traffic will flow through the wireguard
interface.
### DOCKER-COMPOSE.YAML FILE ###
services:
  wireguard:
    image: lscr.io/linuxserver/wireguard:latest
    container_name: wireguard
    hostname: wireguard
    cap_add:
      - NET_ADMIN
      - SYS_MODULE
    environment:
      - PUID=${PUID}
      - PGID=${PGID}
      - TZ=${TZ}
    volumes:
      - ${CONFIG_DIR}/wireguard:/config
      - ${CONFIG_DIR}/wireguard_startup:/custom-cont-init.d:ro
      - /lib/modules:/lib/modules
    ports:
      - 8080:80
    sysctls:
      - net.ipv4.conf.all.src_valid_mark=1
    healthcheck:
      test: ping -c 1 1.1.1.1 || exit 1
      interval: 2s
      start_period: 10s
      start_interval: 2s
      timeout: 5s
      retries: 3
    restart: unless-stopped
  speedtest-tracker:
    image: lscr.io/linuxserver/speedtest-tracker:latest
    restart: unless-stopped
    container_name: speedtest-tracker
    network_mode: service:wireguard
    environment:
      - PUID=${PUID}
      - PGID=${PGID}
      - TZ=${TZ}
      - APP_KEY=${APP_KEY}
      - DB_CONNECTION=sqlite
      - SPEEDTEST_SCHEDULE="*/10 * * * *"
      - DISPLAY_TIMEZONE=${TZ}
    volumes:
      - ${CONFIG_DIR}/speedtest-tracker:/config
    healthcheck:
      test: curl -fSs http://localhost/api/healthcheck | jq -r .message || exit 1
      interval: 10s
      retries: 3
      start_period: 30s
      timeout: 10s
    depends_on:
      wireguard:
        condition: service_healthy
As you may notice, since the network is managed by the wireguard container, in order to expose the port that
speedtest-tracker serves its web interface in, port 80, this port forward needs to be controlled on the wireguard
ports directive instead. Here, we’ve decided to port forward that port to port 8080, which we’ll use to access the
speedtest-tracker web UI.
Finally, like described on the linuxserver.io guide4:
But it doesn’t end there. Even though the port is mapped, once the tunnel is up, it won’t respond to any requests coming from the host as it’s configured to send all outgoing connections through the tunnel.
This means we need to add the routing rules to allow the host to access the container’s web interface. In the article,
this is done as part of the wg-quick configuration file, but since we are using a shell script to set the kill switch
rules, we can add the routing rules there as well. The following lines will allow the host to access the
speedtest-tracker web interface:
#!/bin/bash
set -e

echo "**** Adding iptables rules ****"

HOMENET=192.168.0.0/16
HOMENET2=10.0.0.0/8
HOMENET3=172.16.0.0/12
iptables -I OUTPUT -d $HOMENET -j ACCEPT
iptables -A OUTPUT -d $HOMENET2 -j ACCEPT
iptables -A OUTPUT -d $HOMENET3 -j ACCEPT

# Kill switch
iptables -A OUTPUT ! -o wg0 -m mark ! --mark 0xca6c -m addrtype ! --dst-type LOCAL -j REJECT
ip6tables -I OUTPUT ! -o wg0 -m mark ! --mark 0xca6c -m addrtype ! --dst-type LOCAL -j REJECT

echo "**** Successfully added iptables rules ****"
Here, the various HOMENETs are the local network IP ranges usually used in home networks, as defined in RFC-19185.
We add the iptables rules to allow traffic to flow out to the local network, including the web UI of the speedtest-tracker
container, which is now accessible at http://localhost:8080.
Conclusion#
In this article, we have seen how to set up a WireGuard VPN container that can be used as a kill switch for other containers. We have also seen how to set up a consumer container that uses the WireGuard container’s network stack and how to expose its web interface to the host. The kill switch is implemented using iptables rules that block all outbound traffic unless it is going through the WireGuard interface, and we have ensured that the system fails closed by decoupling the kill switch from the WireGuard connection setup.
This was never intended to be a series of articles, but since it took me so long to finally write it down, my local wireguard stack has evolved quite a bit, including running the WireGuard container as both a client and a server, allowing clients to connect to it over the internet, routing their traffic through the Mullvad VPN connection and giving access to the containers running on the host. Expect a follow-up article on this topic in the future.